The goal of this project is to build my own home router to access the Internet. In a second step, I then want to enable SCION support on the router by installing the SCION stack. The result will be a home router that can natively speak the SCION protocol and even translate between legacy IP and SCION using the SCION IP Gateway (SIG). Of course, regular IP traffic should not be affected and work just fine in parallel to SCION.
Why build your own home router?
Reading the title of this post you might ask yourself: “Why build your own router when my ISP ships a perfectly capable router already?” The truth is that ISPs, like all companies, operate on a budget. It’s in their interest to sell as many Internet connections as possible for as low a cost as possible. ISP provided routers tend to be bad in a couple of ways:
- ISP routers tend to be configured for their convenience and not for security in order to cut down on tech support.
- Often, these devices are locked down in one way or the other. Certain features may not be available and cannot be added by the end user. I think that users should have full control over the devices they run in their own network.
- Updates to ISP provided routers are a rare thing (if they happen at all). Something as critical as your router, protecting your home network from the Internet, should always operate with the latest security patches applied.
- Potentially millions of people run the exact same router with the exact same standard configuration, making these routers a prime target for any attacker.
Overview
With the “Why?” out of the way, I’d now like to provide an overview of my envisioned router.
The figure below shows an abstraction of the desired outcome. The router contains an IP and a SCION stack which are connected to their respective upstream networks. Between the two stacks sits the SIG which translates between IP and SCION. Clients can connect to the router via Ethernet or Wi-Fi. Independent of the connection, clients can make use of both network stacks.
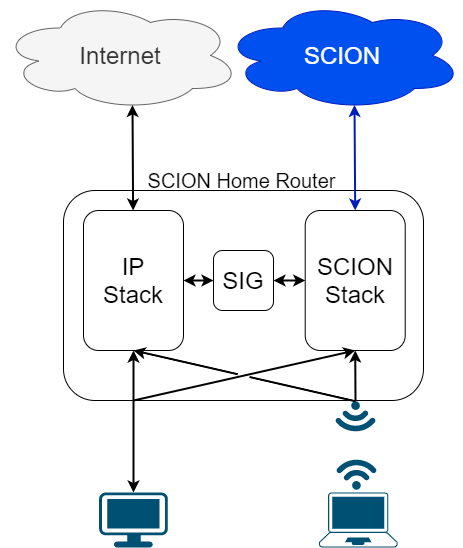
It is clear, that IP packets from my client devices will use the IP stack on the router while SCION packets will use the SCION stack. However, with the SIG I have the possibility to translate certain IP connections to SCION connections. This is useful to make applications that are completely oblivious of SCION benefit from SCION features such as path selection, multi-path communication and hidden paths. The downside is that on the other end another SIG is needed to translate the SCION packets back to IP. This means that I need prior knowledge about which IP addresses sit behind a SIG and can therefore be accessed via SCION. I need to manually configure these address on my home router, such that it knows to send corresponding packets via the SIG, translating the connections to SCION. The goal is to make this configuration easily accessible via the router’s web interface.
A few words about residential SCION connectivity: Because most ISPs, like mine, don’t yet offer a native SCION connection, I will connect my router to the SCIONLab network. SCIONLab is a global research network, open to anyone who wants to try out SCION. Once my ISP offers access to the SCION production network I’ll be able to easily switch over to that network.
The Hardware
For the hardware, I chose the APU platform from PC Engines which is a widely adopted server platform for low power, wireless networking and embedded applications based on the x86 architecture. All the parts required for this build are listed below.
| Part | Description |
|---|---|
| apu2e4 | APU.2E4 system board (GX-412TC quad core / 4GB / 3 Intel GigE / 2 miniPCI express / mSATA / USB / RTC battery) |
| case1d2bluu | Enclosure for alix2 / apu1 / apu2 (3 LAN, blue, USB) |
| ac12veur3 | AC adapter with euro plug |
| msata16g | 16GB mSATA SSD module |
| wle600vx | Compex WLE600VX 802.11ac miniPCI express wireless card |
| 2 x antsmadb | Antenna |
| 2 x pigsma | IPEX to reverse SMA pigtail cable |
| usbcom1a | USB to DB9F serial adapter |
Assembling the Router
For the basic assembly of the APU I followed this video:
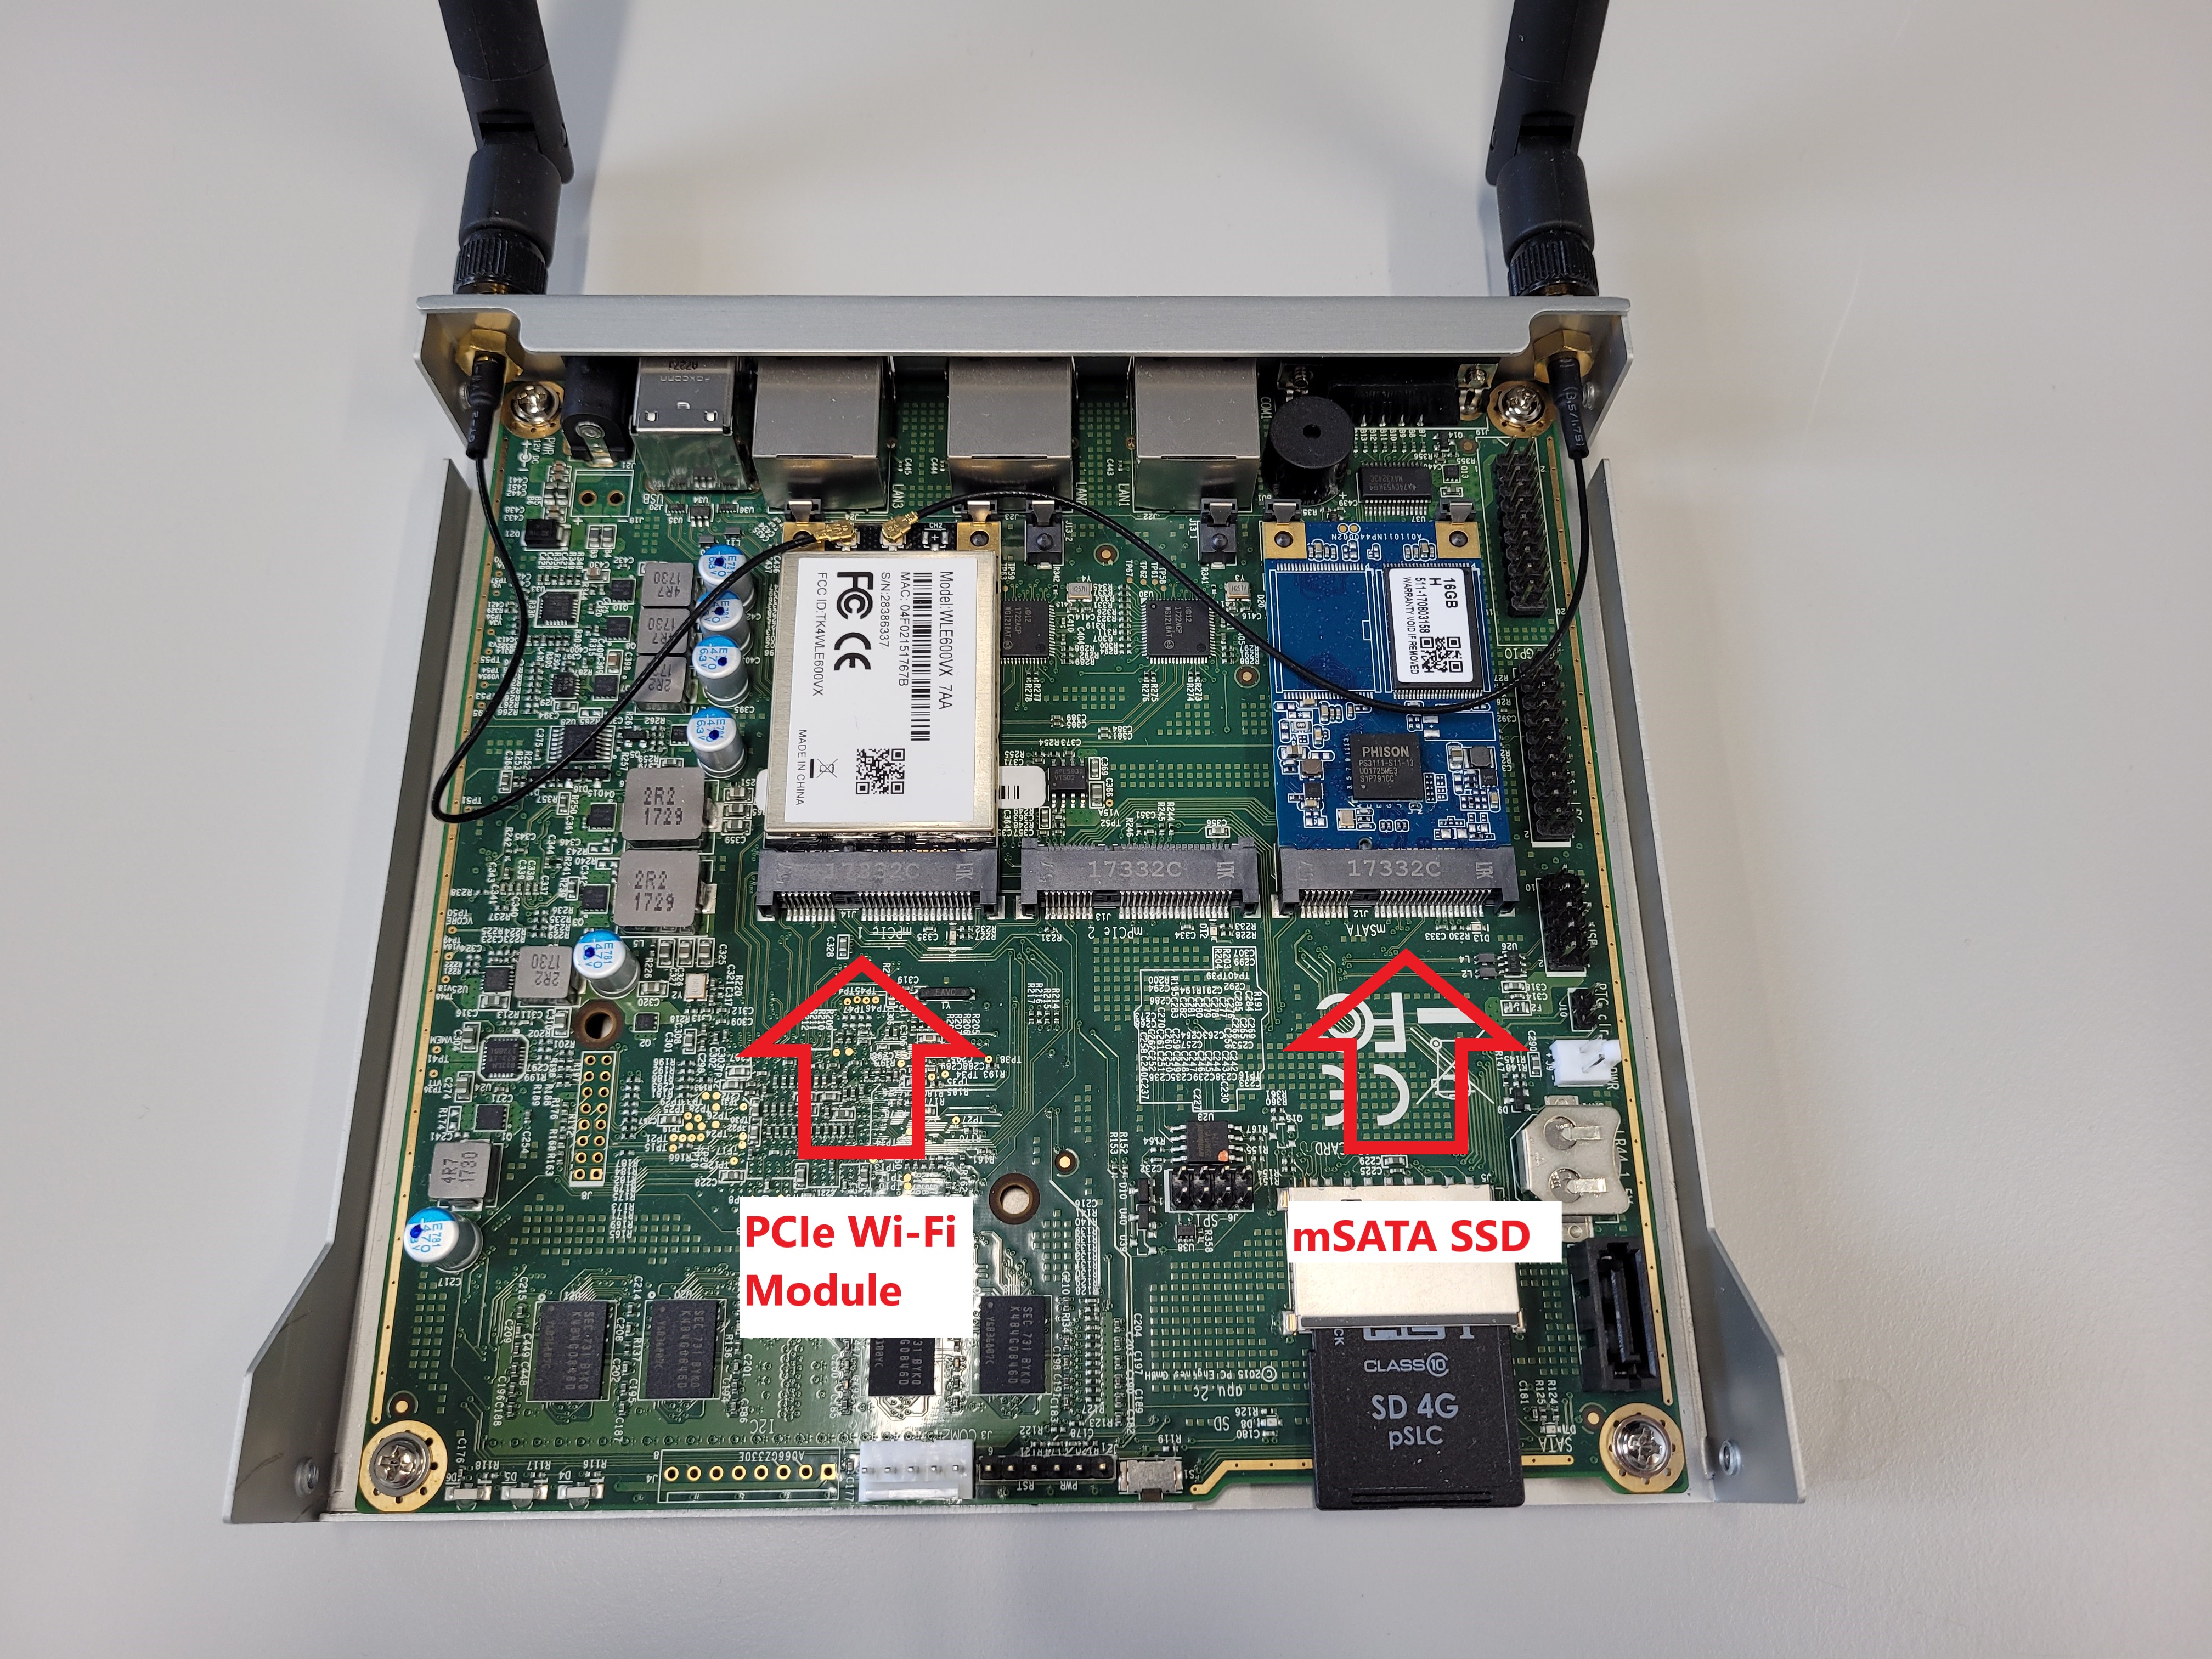
In addition to the standard setup, of course I also wanted my router to be Wi-Fi capable! For that reason I installed the miniPCI wireless card and the antennas.
Internals of my router:
This is what my fully assembled router looks like:

The Software
Of course, hardware alone doesn’t make a router. Luckily, there are excellent open-source router platforms available. One of them is OpenWRT.
OpenWRT
OpenWRT is a full Linux-based operating system designed for wireless routers. It offers a writable file system and it even includes a package manager which makes the OS highly extensible. OpenWRT has wide support for different hardware, including our APU2 board.
OpenWRT ships with a web UI called LuCI. LuCI is your typical router’s user
interface which you can access over the web (usually 192.168.1.1).
However, like everything else about OpenWRT it is very feature rich and highly customizable.
Accessing the board
Since the APU2 board does not have a display output and SSH is only available
once the OS is installed, we need to rely on the DB9 serial port to establish a
connection. There are several serial communication programs available. I used
picocom. The following command connects to the board
over the USB-to-serial cable plugged into my computer and the APU:
picocom -b 115200 /dev/ttyUSB0
115200 is the baud rate (or symbol rate) of the APU.
Flashing the OS
At the time of writing, the most recent OpenWRT version is 19.06.4 and can
be downloaded from
here.
I’ll be using the Ext4 file system instead of the squashfs because I’d like to
have a fully writable file system and space limitations are not a concern thanks
to the large 16GB SSD installed in the board. The OS comes with two partitions, the boot partition and
the root file system partition. I used to following steps to flash the OS to the
board and expand the root file system to use the full size of the SDD (instead of
an SD card, one can also use a USB thumb drive):
- Copy the downloaded image onto to an SD card:
gzip -dc openwrt-19.07.7-x86-64-combined-ext4.img.gz | sudo dd status=progress bs=8M of=/dev/sdX - Boot the board from SD card
- Clone the SD onto the SSD drive:
dd bs=8M if=/dev/mmcblk0 of=/dev/sda - The root partition now has the same size (256M) as the SD. We need to increase it:
fdisk /dev/sda(fdisk needs to be installed)d 2to delete the root file system partition on the SSDn 2to create a new partition, when asked for input accept standard valuespto see the new partition layout, confirm the second partition has increased in sizewto write the changes to disk
- Copy over the root file system from the SD card:
dd bs=8M if=/dev/mmcblk0p2 of=/dev/sda2 - Expand the file system to make use of the entire partition:
e2fsck -f /dev/sda2(accept eventual repairs)resize2fs /dev/sda2(resize2fs needs to be installed)
- remove the SD card and boot from SSD, confirm the root partition
/dev/roothas increased in size:df -h
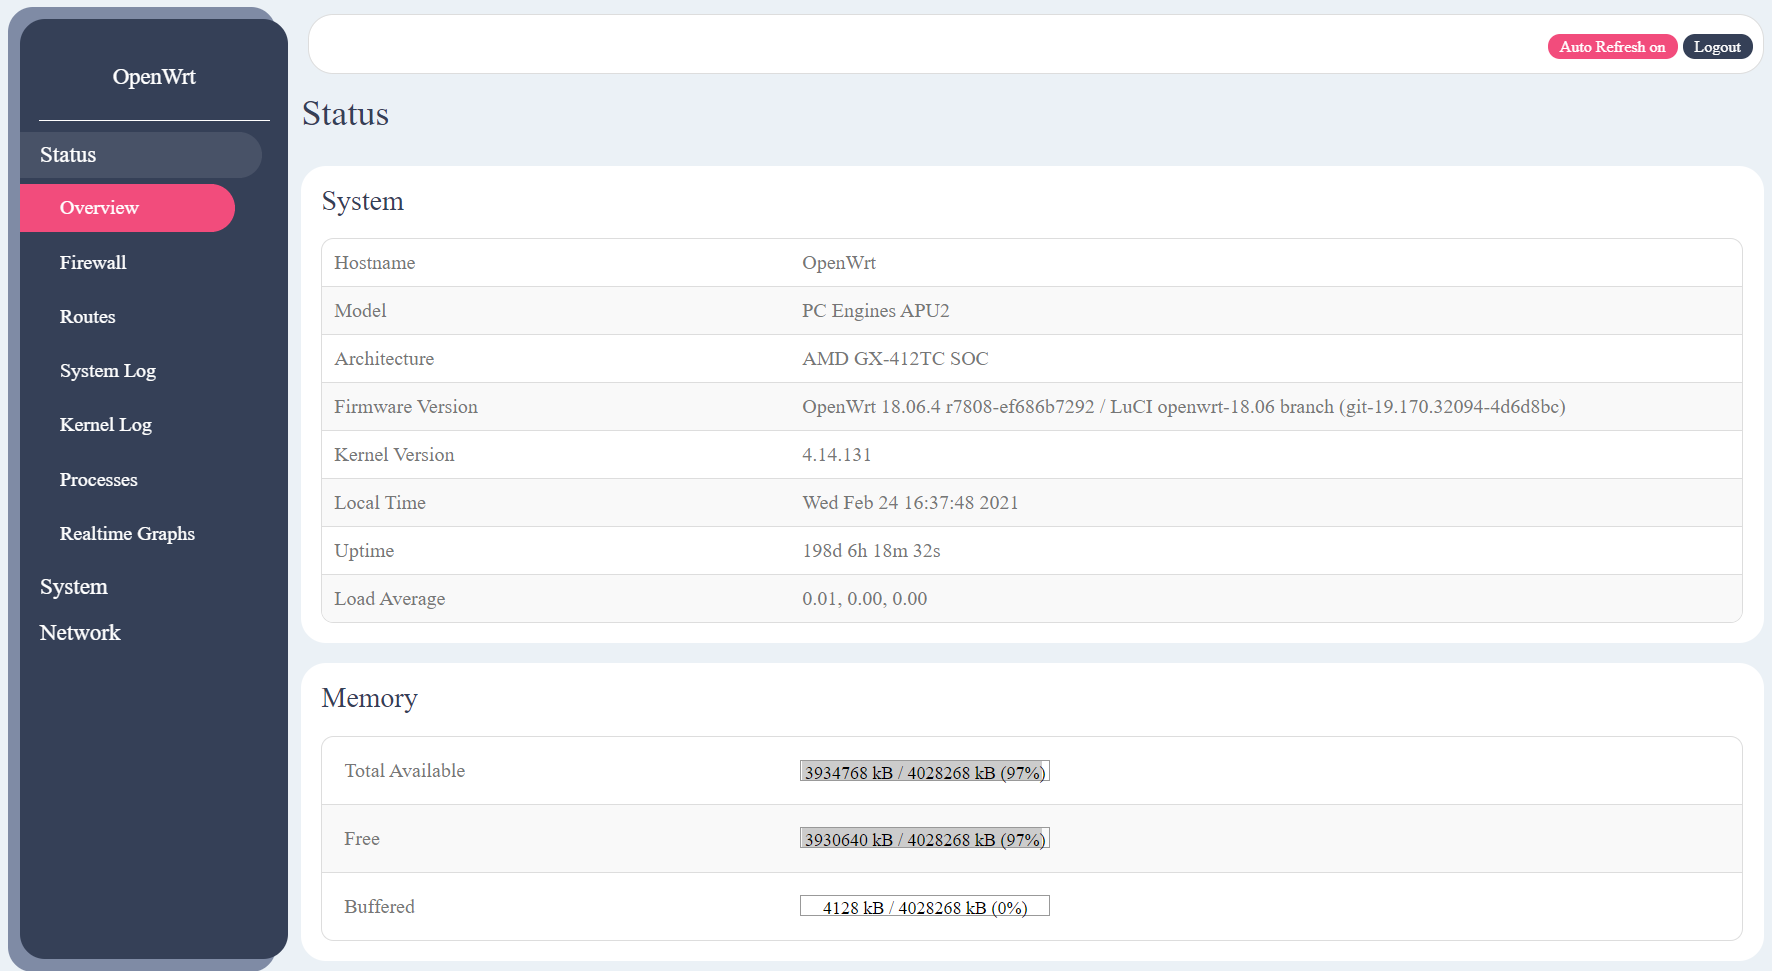
Success! The router can now be accessed via browser at 192.168.1.1.
Enabling Wi-Fi
OpenWRT does not ship with the driver and firmware for the wle600vx Wi-Fi card out of the box. The following packages need to be installed manually:
ath10k-firmware-qca988x- the firmware for the Qualcom Atheros 9882 SoC on the cardkmod-ath10k- the driver for our Atheros based cardwpad-mini- for adding support for strong crypthographic authentication, such as WPA2
After a reboot, the Wi-Fi card should be recognized and show up in the LuCI interface.
Make it speak SCION
So far, I have a fully functional and highly configurable router, where I
control the hard- and software. This was the first goal of the project. The next
step is now to install the SION stack on the router. The plan is to run
a full SCION autonomous system (AS) inside the router. For this, I will install
the SCION Control Service, SCION Border Router, SCION Dispatcher, SCION Daemon
and the SCION IP Gateway.
Compiling the SCION binaries
The services listed above are written in Google’s Go
programming language and are targeting Debian x86 systems. However, some
of the services call functions from the C standard library behind the scenes.
Since Debian uses the GNU C Library (glibc), the services are dynamically
linking against that specific libc implementation. Usually this is not a
problem. However, OpenWRT uses musl-libc which means that
the services need to be compiled from source against musl-libc.
Luckily, it is easy to adapt the usual go build command to accept a C compiler
other than the default.
The following commands build the binaries using musl-gcc which is a wrapper for the
gcc toolchain that targets musl-libc instead of glibc:
CC=/usr/local/musl/bin/musl-gcc go build --ldflags '-linkmode external'
CC=/usr/local/musl/bin/musl-gcc go build --ldflags '-linkmode external -extldflags "-static"'
The first command builds dynamically linked binaries whereas the second command builds statically linked binaries.
Adding a SCION tab to the LuCI interface
With the back end ready to to speak SCION, the only thing missing now is a new tab in the LuCI user interface to configure the SCION configuration.
A brief explanation on how to add a new tab to the LuCI interface can be found here. Essentially, it requires a web view written in HTML together with a back end written in Lua. I added a SCION tab with two sub-tabs, one for the SCION configuration and one for the SIG configuration.
This is the result:
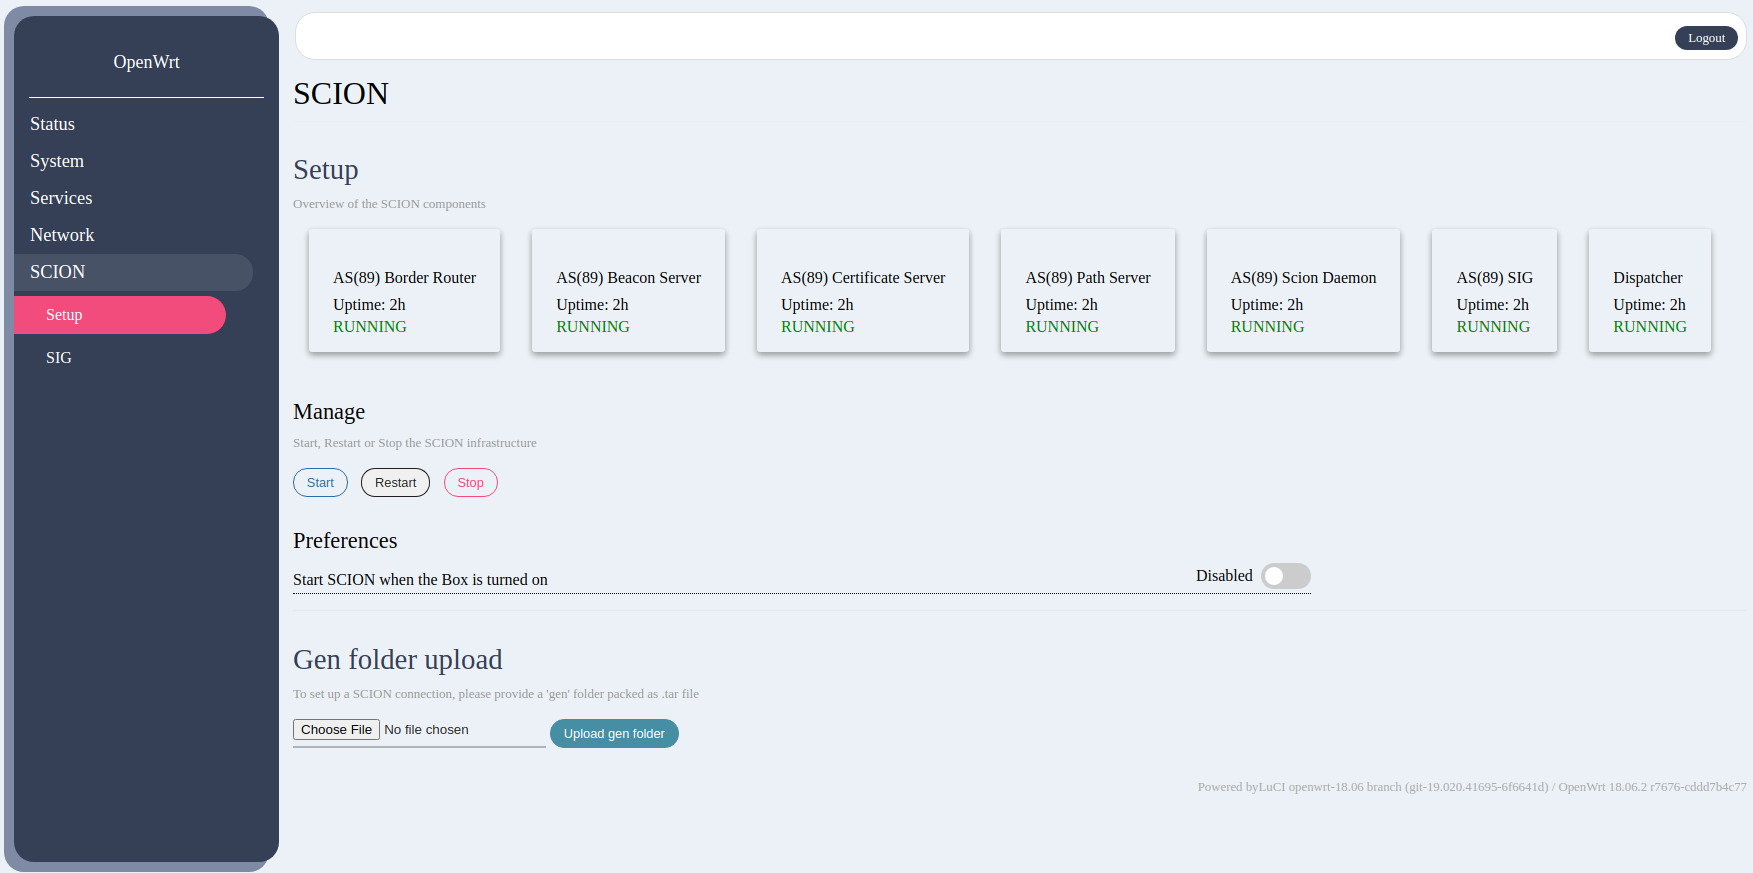
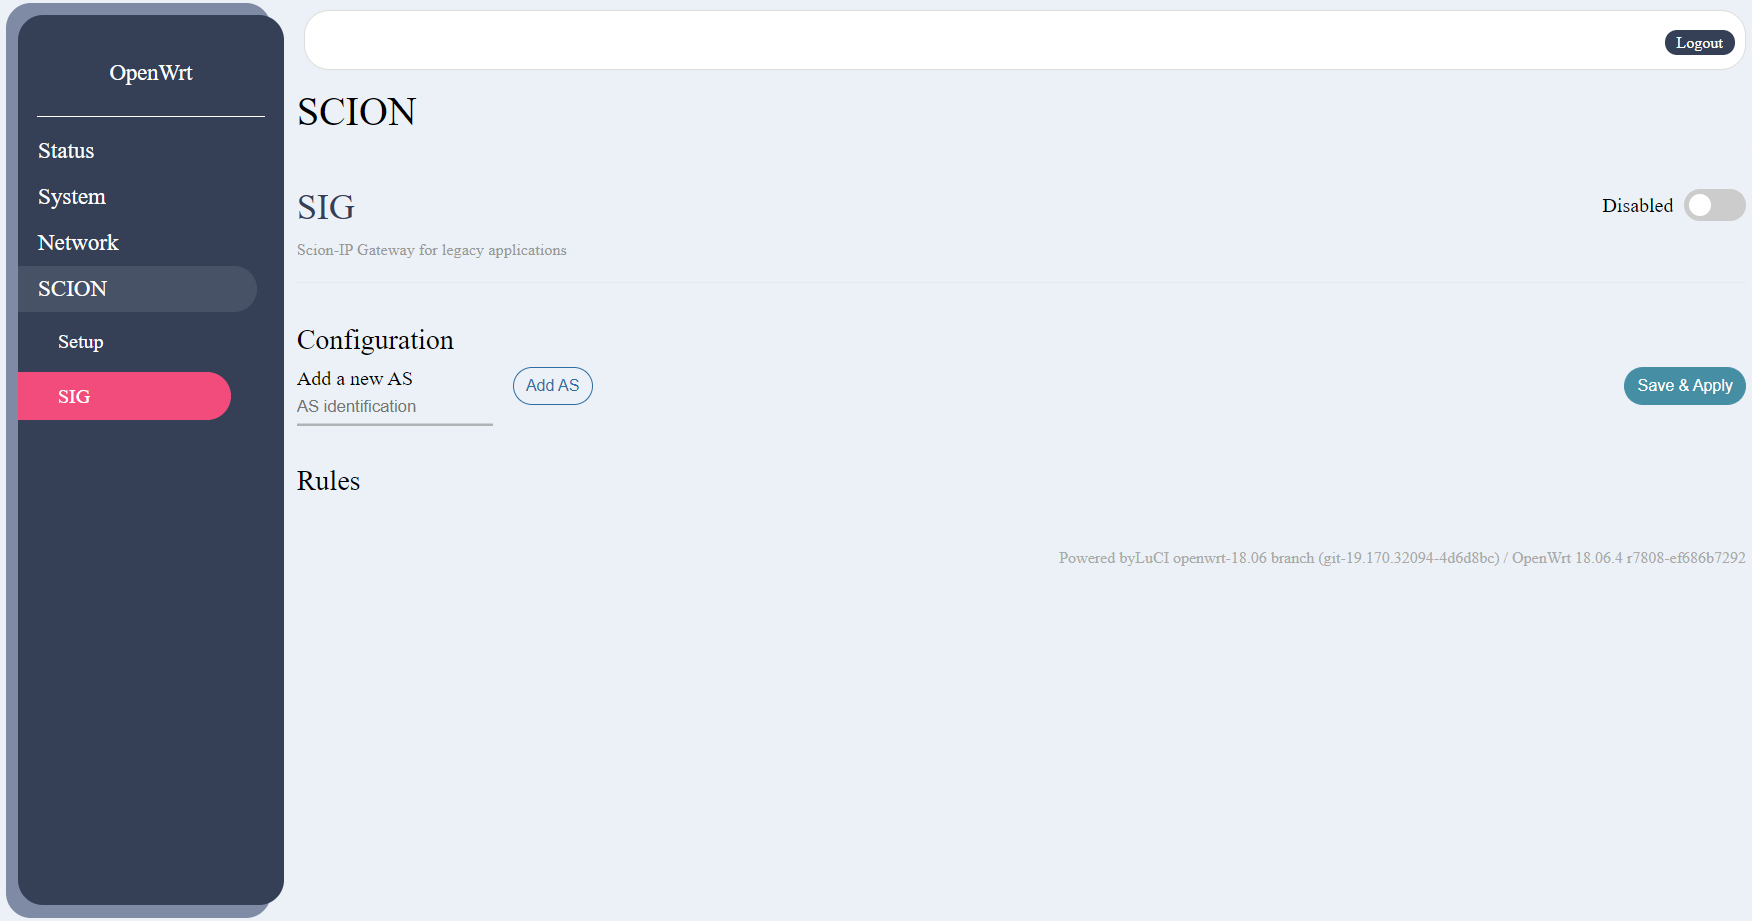
I can upload any valid SCION configuration and then use the Start, Restart and
Stop buttons to control the SCION installation through the convenience of
the LuCI interface. Additionally, SIG rules can be defined and the SIG can be
started and stopped independently of SCION.
Testing
Bandwidth measurements
To make sure everything works as expected and to get a sense of the performance, I first tested basic IP connectivity using speedtest.net via Ethernet and Wi-Fi.
Ethernet

Wi-Fi

(SCION measurements follow)
Presentation
The SCION home router has been showcased at the SCION Day on November 6, 2019. Find the slides and video here: SCION Day presentation.


Leave a comment